

20 Sep How to Install ACP Cladding Step by Step
Table of Contents
If you want to put up ACP cladding, you need a simple guide. This guide should help you stay safe. You must measure everything carefully. Good planning gives you the best results. Always clean and check your surface before starting. Safety is important, so wear gloves and goggles every time.
The need for ACP cladding is growing around the world:
The market was worth USD 7.85 billion in 2024.
Shipments went up by 67% in just one year.
More cities and new buildings make this happen.
ACP panels are liked because they look nice, are light, and last long.
Here is a quick list of why good acp sheet installation is helpful:
Durability Features | Aesthetic Features |
|---|---|
Stops rust in places near the ocean | Solid colors in matt, gloss, or satin finish |
Keeps color bright in the sun | Shiny and brushed aluminum looks |
Stays strong against hail and debris | Wood and stone-like textures |
Needs little care or cleaning | Special colors and designs |
If you follow each step and get ready first, you will get a pro finish every time.
Key Takeaways
Getting ready is very important. Clean the surface well before you start. Check the surface to make sure it is good. This helps the panels stick better and last longer.
Use the correct tools for the work. You need a measuring tape, spirit level, and circular saw. These tools help you cut and line up the panels right.
Always follow safety rules. Wear gloves and goggles to stay safe. This helps stop injuries while you work.
Seal the joints the right way. Good sealing keeps water and dust out. This helps your ACP cladding stay strong.
Take care of your panels often. Clean them every few months. Check for damage to keep them looking nice and new.
Tools and Materials for ACP Cladding
Tools Checklist
You need the right tools for acp panel installation to get a smooth finish. Start with a measuring tape and chalk line. These help you mark where each panel goes. Use a spirit level and square to keep your lines straight. A circular saw or panel cutter lets you cut panels neatly. Grab a drill and screwdriver for fastening. A rivet gun or screw gun helps you attach panels quickly. You also need a caulking gun for sealant. Clamps and suction cups make it safer to hold panels while you work.
Tip: Always check your tools for acp panel installation before you start. Clean and test them to avoid problems during the job.
Materials Needed
You want to pick materials that last and look good. Here’s a quick table to help you compare options:
Material | Cost per m² | Characteristics |
|---|---|---|
Fibre Cement | Durable, low maintenance, looks like wood or stone. | |
Metal Cladding | $50 – $100 | Strong, modern finish, easy to clean. |
ACP sheets are popular because they are lightweight and versatile. Some panels use recycled materials and can be recycled again when you replace them. This helps the environment. Fiber cement panels have a lower impact on nature because they use less carbon-intensive materials.
Fire safety matters too. Aluminum composite panels usually have a B1 rating, which means they are hard to ignite. Fire-resistant ACP panels get an A2 rating, so they do not burn easily.
Warranty Note:
ACP makers often do not offer warranties. You should check with your supplier before you buy. Most sellers say you use the product at your own risk.
If you have leftover panels, you can crush and grind them. Then, separate the aluminum from the core using special machines. This keeps waste low and helps recycling.
Surface Preparation for Installation
Inspect and Clean Surface
You want your ACP cladding to last, so start with solid preparation for aluminium composite panel. First, check the wall or surface where you plan to install the panels. Look for cracks, bumps, or loose spots. If you see any problems, fix them before you move on. A smooth base helps the panels stick well and stay strong.
Here’s a simple checklist to guide your preparation for aluminium composite panel:
Make sure the area is clean and in good shape.
Repair any damage so the surface is smooth.
Double-check the layout and size of your ACP sheets to match your building plans.
Tip: Use a broom or vacuum to clear away dust and dirt. Wipe the surface with a damp cloth for a clean finish.
Some surface issues can cause trouble later. Take a look at this table to see what you should avoid:
Surface Issue | Explanation |
|---|---|
Improper Material Selection | Using indoor panels outside can cause fading and damage. |
Adhesive Issues | Wrong glue can make panels peel off, especially outdoors. |
Deformation and Drumming | Weak base materials can bend or break, so pick rust-proof and tough options. |
A clean and sturdy surface gives you a better layout and keeps your panels looking sharp for years.
Measure and Mark
Now, let’s talk about measurement and layout. Grab your measuring tape and a thickness gauge. You want to measure at least 20 mm from the edge of each panel. Check the four corners and the middle. This helps you spot any errors and makes sure your panels fit just right.
Here’s how you can get accurate measurement and layout:
Use a thickness measuring tool with a score of 0.01 mm.
Measure at the corners and the center of each panel.
Compare all measurements to the panel’s nominal value.
Mark your layout lines with chalk or a marker so you know where each panel goes.
Good measurement and layout mean your ACP panels line up perfectly. Take your time with this step. If you rush, you might end up with gaps or crooked panels. Careful marking helps you follow your layout and keeps your project looking professional.
Remember: Double-check your layout before you start installing panels. This saves you time and prevents mistakes.
Step by Step ACP Sheet Installation Process
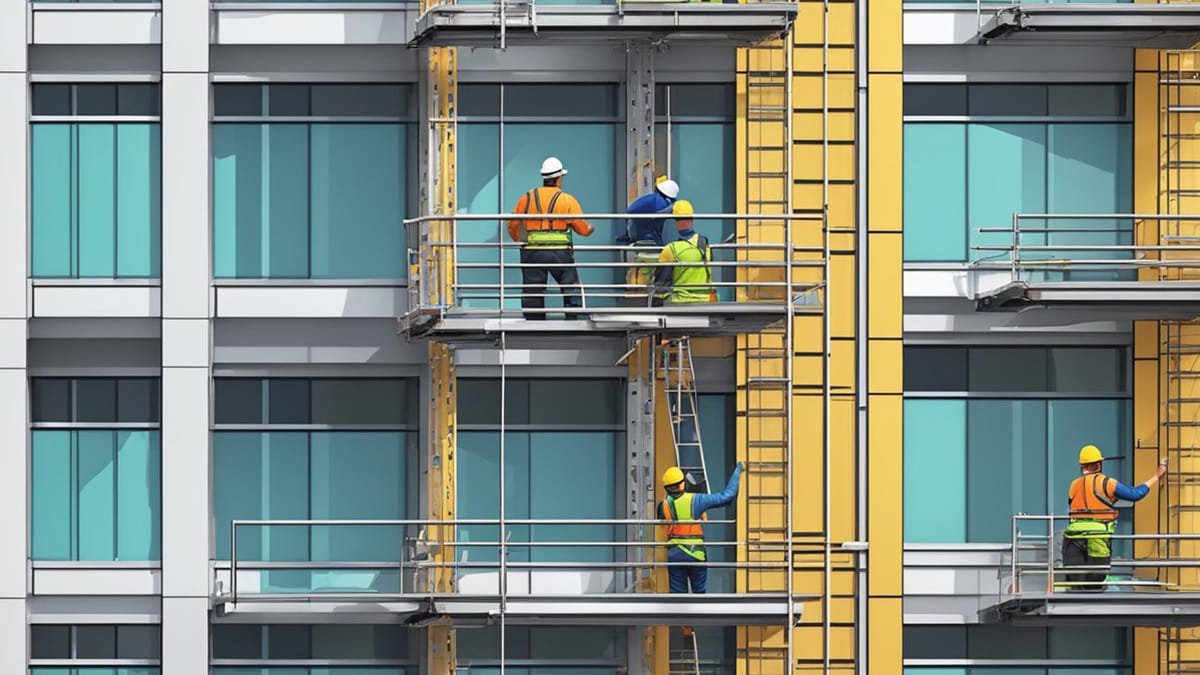
Installing acp cladding can seem tricky, but you can do it if you follow each step. This guide will help you install acp panels safely and get a professional finish. Let’s walk through the acp sheet installation steps together.
Install Framing
You need a strong frame before you install acp panels. The frame supports the panels and keeps them straight. Start by measuring and marking where the frame will go. Use a spirit level to make sure your lines are straight. You can use aluminum or galvanized steel for the subframe. These materials last long and do not rust.
Follow these steps to build your frame:
Clean the area and gather your tools and sheets.
Install the subframe using aluminum or galvanized steel.
Fix the framework supports with the right spacing. Most people use 600 mm to 900 mm between supports.
Anchor the frame with mechanical anchors or brackets.
Double-check your layout before you move on.
Tip: Always wear gloves and safety glasses when you install the frame. This keeps you safe from sharp edges and flying debris.
Here’s a table to help you avoid common mistakes during this step:
Mistake | Explanation |
|---|---|
Improper Measurements | Incorrect measurements can lead to ill-fitting panels, gaps, and overlaps. |
Inadequate Surface Preparation | Failing to properly clean and smooth the surface can result in poor adhesion or premature wear. |
Incorrect Fastening | Using the wrong screws or fasteners can cause the panels to loosen or warp over time. |
Cut ACP Panels
Cutting acp panels is the next step. You want each panel to fit perfectly. Use a CNC router or a saw with carbide-tipped blades. These tools give you clean, straight cuts. Always measure twice before you cut. Mark the cutting lines with a pencil or chalk.
Here’s how you can cut acp panels safely:
Place the sheets on a flat surface.
Secure the sheets with clamps so they do not move.
Wear ear protection and safety glasses.
Cut slowly and follow your marked lines.
Note: If you use brushed or 3D acp sheets, make sure the pattern lines up with your design.
Install ACP Panels
Now you are ready to install acp panels. Start at a fixed point, like a corner or the bottom of the wall. This helps you keep the panels straight as you move along. Hold the first panel in place and check the alignment with a level.
Follow these acp sheet installation steps:
Pre-drill holes in the panels and the support profiles. This prevents the sheets from cracking.
Apply adhesive to the back of the panels for extra hold, especially for larger sheets.
Attach panels using screws or rivets. Start from one corner and work your way out.
Use clamps or suction cups to hold the panels while you fasten them.
Tip: Do not overtighten the screws. This can bend the panels and ruin the finish.
Align and Secure Panels
Alignment is key if you want your acp cladding to look professional. Each panel should line up with the next one. Use a spirit level and a chalk line to check your work as you go. If you see a gap or a crooked panel, fix it right away.
Here are some tips for perfect alignment and securing:
Measure and mark accurately before you install acp panels.
Install vertical and horizontal support profiles, checking alignment with a level.
Secure acp panels using screws or rivets, starting from one corner.
Check each panel for gaps or misalignment before moving to the next one.
Clean the surface of the panels after you finish installing each one.
Callout: If you use 3D or brushed acp sheets, double-check the direction of the pattern for a seamless look.
Seal Joints
Sealing is the last step in the step by step acp sheet installation process. You need to seal the joints between the panels to keep out water and dust. Good sealing also helps your acp cladding last longer.
You have a few options for sealing joints:
Method | Description |
|---|---|
Wet Sealant Joint | Use a high-quality silicone sealant for water tightness in joints. |
Dry Gasket Joint | Use gaskets instead of sealants. This prevents staining and dirt buildup. |
Narrow Open Joint | Use narrow joints with EPDM gaskets or sealants for a clean look. |
Apply the sealant or gasket along the seams where the panels meet. Smooth the sealant with a tool or your finger for a neat finish. Make sure you do not leave any gaps.
Note: Always work in a well-ventilated area when sealing joints. This keeps you safe from fumes.
Here’s a quick safety checklist for installation:
Safety Gear | Description |
|---|---|
Safety glasses | Protects eyes from debris during installation |
Gloves | Prevents cuts and scrapes |
Ear protection | Reduces noise from cutting and drilling |
Installation Condition | Description |
|---|---|
Safe working conditions | Keep the area free from hazards |
Proper ventilation | Reduces inhalation of harmful fumes during sealing |
If you follow these acp sheet installation steps, you will get a strong, neat, and long-lasting finish. Remember, the right tools, careful alignment, and good sealing make all the difference when you install acp panels.
Finishing and Inspection
 Check for Gaps
 Check for Gaps
You’ve installed all your ACP panels, but don’t rush to pack up your tools just yet. Take a close look at every joint and edge. Gaps between panels can let in water or dust, which can cause problems later. Use your fingers to feel along the seams. If you spot a gap, you can fill it with a high-quality sealant. Make sure the sealant matches the color of your panels for a neat look.
Here are some common finishing issues you might see:
Paint Peeling: This happens if the paint was not applied right or if the weather is harsh. Clean the area and repaint if needed.
Color Fading: Sunlight can make colors fade. You can prevent this by choosing UV-resistant panels.
Dirt Buildup: Pollution and dust can stick to the panels. Regular cleaning helps keep them looking new.
Tip: Always check the corners and edges. These spots are easy to miss but can cause the most trouble.
Clean Panels
Now it’s time to make your work shine. Use a soft cloth or sponge with mild soap and water. Wipe down each panel to remove dust, fingerprints, or leftover sealant. Avoid harsh chemicals because they can damage the finish. If you see stubborn spots, try a little more soap and gentle rubbing.
A clean surface not only looks better but also helps you spot any small issues you might have missed. Regular cleaning keeps your panels bright and extends their life.
Final Inspection
Before you call the job done, do a final walk-around. Look at the panels from different angles. Check for scratches, dents, or uneven spots. You want everything to look smooth and even.
Industry standards say you should inspect ACP cladding at several stages. Here’s a quick table to show you what professionals check:
Inspection Stage | Description |
|---|---|
Raw Materials Check | Test materials when they arrive to make sure they meet the right standards. |
Manufacturing Stage Check | Check panels during production to catch any problems early. |
Product Check | Test finished panels before they leave the factory. |
Post Production Check | Inspect panels for defects and correct size before shipping. |
Manufacturers also follow strict rules. They need certifications like ISO for quality and FR for fire safety. These steps help make sure your ACP cladding is safe and lasts a long time.
Remember: A careful final inspection means you can enjoy your new ACP cladding without worries. If you find any problems, fix them now for the best results.
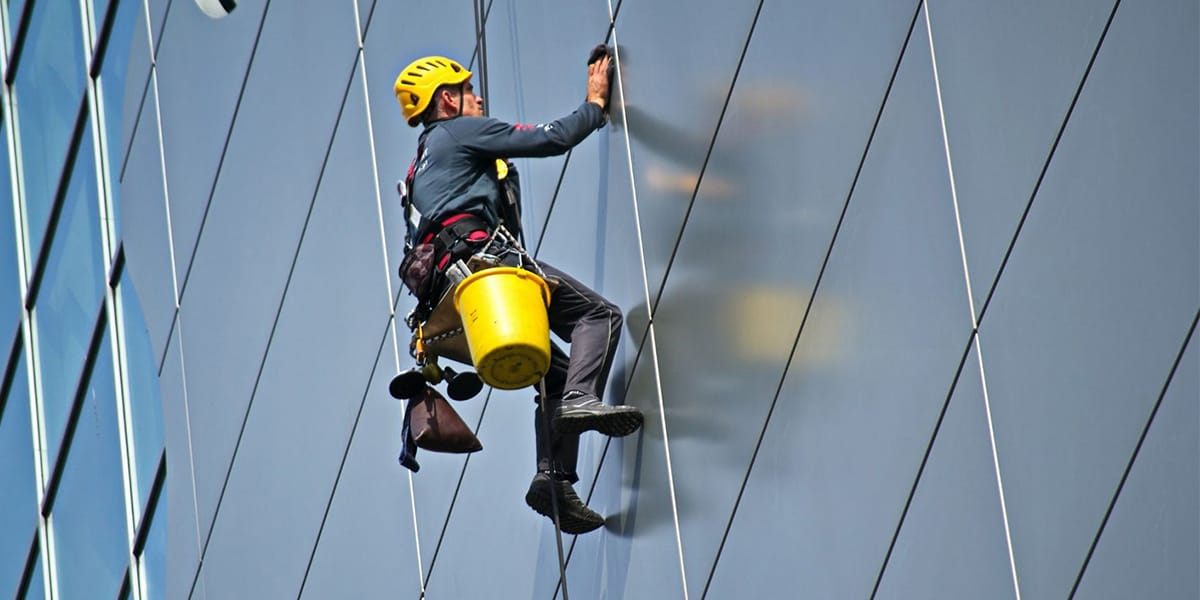
Safety and Maintenance Tips
Safety During Installation
You want to stay safe while working with ACP cladding. Safety gear protects you from accidents and injuries. Before you start, check that you have everything you need. Here’s a quick list of recommended equipment:
Safety helmet
Harness (especially if you work at heights)
Protective eyewear
Gloves
Appropriate clothing
Put on your helmet and harness if you’re climbing or working above ground level. Gloves keep your hands safe from sharp edges. Protective eyewear shields your eyes from dust and flying bits. Wear sturdy clothes that cover your arms and legs. Always keep your workspace clean and free of clutter. If you use power tools, make sure you know how they work. Take breaks if you feel tired. Safety comes first every time.
Tip: Double-check your gear before you start. If something feels off, fix it right away.
Maintain ACP Cladding
You want your ACP cladding to look great and last for years. Regular cleaning and inspections help you catch problems early. Use fresh water and a soft cloth to wipe down the panels. Mild detergent works well for everyday dirt. For tough stains, try cleaners like isopropyl alcohol, ammonia-based solutions, or citrus cleansers. Here’s a table to help you pick the right cleaning agent:
Cleaning Agent | Description | Tips for Use |
|---|---|---|
Isopropyl Alcohol | Removes tough stains and grease | Mix with water, use a soft cloth |
Ammonia Based Cleaner | Strong degreaser for stubborn spots | Dilute, scrub gently, rinse well |
Citrus Cleanser | Eco-friendly, good for light cleaning | Apply, let sit, rinse and dry |
Mild Detergent | Keeps panels shiny and clean | Mix with water, scrub gently, rinse and dry |
Inspect your panels twice a year, in spring and fall. Look for loose fasteners, cracked sealant, scratches, dents, or discoloration. Tighten screws and touch up scratches with approved paint. If you spot damage, clean the area, sand it smooth, fill dents, prime, and paint. For big problems, you may need to replace the panel.
Clean panels every 3–6 months.
Check joints and edges for gaps or cracks.
Repair chips or corrosion quickly.
Follow a regular cleaning schedule.
Note: Regular care keeps your ACP cladding strong and beautiful. Small repairs now prevent big problems later.
You now know how to put up ACP cladding step by step. Good planning and measuring help you do a nice job. Always wear safety gear to stay safe. Clean your panels often so they look good. Experts have some tips for you: * Get people who know how to work with ACP sheets. * Follow the maker’s rules for installing. * Watch the joints and spaces between panels. * Clean and check your panels a lot. * Choose sheets that work well where you live. If you have problems, you can find help online. There are guides and info sheets for ACP products. You can also ask customer service for help. Wondering about cost? Here is a simple table to compare:
Aspect | Professional Installation | DIY Installation |
|---|---|---|
Labor Costs | Higher | Lower |
Material Costs | Varies | Usually lower |
Installation Time | Longer | Faster |
Quality Assurance | Higher | Might have problems |
Maintenance Considerations | Lasts longer | May need more repairs |
If you want the best look or have a hard job, call a pro. Taking care of your panels and making smart choices helps them last a long time.
FAQ
How long does ACP cladding last?
You can expect ACP cladding to last 15 to 20 years. If you clean it often and fix small problems quickly, it may last even longer. Good care keeps your panels looking new.
Can I install ACP cladding by myself?
Yes, you can install ACP cladding if you have the right tools and follow safety steps. For big jobs or tall buildings, you may want to call a pro.
What is the best way to clean ACP panels?
Use a soft cloth and mild soap with water. Avoid harsh chemicals or rough brushes. For tough stains, try isopropyl alcohol.
Tip: Clean your panels every few months for the best shine.
Are ACP panels waterproof?
ACP panels resist water well. When you seal the joints properly, water cannot get behind the panels. Always check the seals during your regular inspections.
Do ACP panels fade in the sun?
Most ACP panels have a UV-resistant coating. This helps keep colors bright. If you live in a very sunny place, pick panels with extra UV protection for the best results.