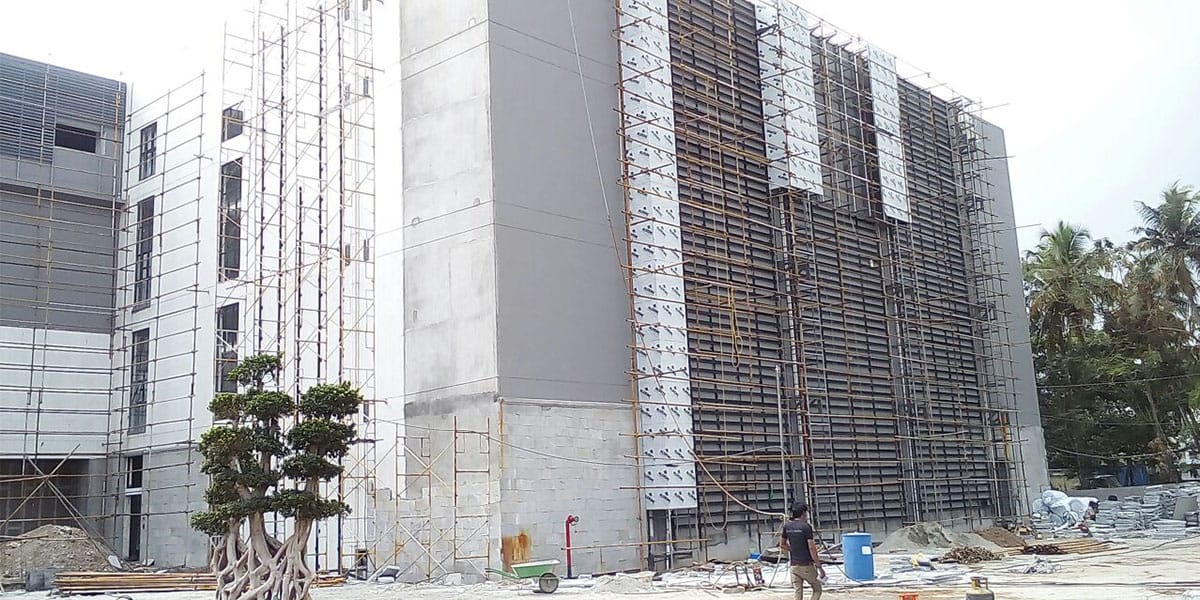
Aluminium composite panels offer a perfect blend of durability and versatility, making them a top choice for modern construction. These aluminium composite panels resist weather changes and stains, ensuring long-lasting performance. Their lightweight nature simplifies handling and reduces labor costs during installation. You can also enjoy their aesthetic flexibility, as they come in a variety of colors and finishes to suit any design. Beyond their visual appeal, these aluminium composite panels enhance energy efficiency and are fully recyclable, supporting eco-friendly practices. Whether for cladding, roofing, or decorative elements, aluminium composite panels elevate both functionality and style in your projects.
Tools and Materials for Aluminum Composite Panel Installation
Before starting the installation process, you need the right tools and materials to ensure a smooth and efficient workflow. This section outlines the essential tools and materials required for installing aluminum composite panels.
Essential Tools
Having the proper tools is crucial for precise and safe installation. Here’s a list of tools you’ll need:
Measuring tape and level: These tools help you measure accurately and ensure the panels are aligned correctly.
Drill and drill bits: Use these to create holes for screws or brackets during the installation process.
Circular saw or jigsaw with metal-cutting blades: These are necessary for cutting the panels to the required size.
Screwdriver or power driver: These tools allow you to secure screws and brackets firmly.
Safety gear: Always wear gloves, goggles, helmets, and other protective equipment to ensure your safety while working.
For specialized tasks, you may also need a CNC router or hand router for precise panel shaping and a 3-roller bending machine if you plan to roll the panels.
Resists corrosion and fading from environmental factors
Core Layer
Polyethylene or fire-resistant metals
Adds rigidity and improves heat and impact resistance
Bottom Layer
Aluminum
Enhances stability and provides a sturdy base
In addition to the panels themselves, you’ll need:
Screws, brackets, or adhesive: These are used to attach the panels securely, depending on the chosen fixing method.
Sealant or weatherproofing material: Apply these to protect the edges and joints from moisture and environmental damage.
Cleaning supplies: Use a lint-free cloth and a 70% solution of isopropyl alcohol to clean the surface. Avoid cleaners containing silicone or soap, as they can leave residues that interfere with adhesion.
By gathering these tools and materials beforehand, you’ll set yourself up for a successful aluminum composite panel installation.
Preparing the Surface for ACP Sheet Installation
Proper surface preparation is essential for a successful aluminum composite panel (ACP) installation. By following these steps, you can ensure a clean, stable, and well-prepared surface for your project.
Cleaning and Inspecting the Surface
Before starting, you need to clean and inspect the surface thoroughly. A clean surface ensures better adhesion and prevents defects during installation.
Use a soft cloth or sponge with mild detergent to remove dirt, grease, and grime.
Avoid abrasive materials that could scratch the surface.
Rinse the area with clean water to eliminate any residue.
Make sure the surface is completely dry before proceeding.
Ensure working in a clean, dust-free environment to avoid scratching the panel surface or causing defects during installation.
Regular cleaning not only prepares the surface but also keeps the panels looking their best over time. For areas exposed to harsh environments, schedule periodic inspections to check for signs of wear or damage.
Measuring and Marking
Accurate measurements and markings are crucial for a precise installation. Start by measuring the installation area carefully. Use a measuring tape and level to ensure accuracy. Once measured, mark the positions for brackets, screws, or adhesive application. These markings will guide you during the installation process, reducing errors and saving time.
Applying Air and Vapor Barrier (Optional)
In some cases, applying an air and vapor barrier can enhance the durability and performance of your installation. These barriers prevent air infiltration and moisture transport, protecting the substrate and improving thermal performance.
Adhere sheets of air and vapor barrier to the substrate.
Overlap individual rolls by approximately 2 inches to ensure a watertight seal.
Proper overlapping techniques are critical. Generous overlaps, typically between 3 to 12 inches, help maintain the continuity of the barrier and prevent moisture infiltration. Always follow the manufacturer’s instructions for best results.
By preparing the surface correctly, you set the foundation for a smooth and durable ACP installation. Take your time during this step to avoid complications later in the process.
Step-by-Step ACP Sheet Installation Process
Cutting the Panels
Cutting aluminum composite panels accurately is essential for a professional finish. Follow these steps to ensure precision and safety:
Measure and mark the panels carefully using a measuring tape and a straight edge. Double-check your measurements to avoid errors.
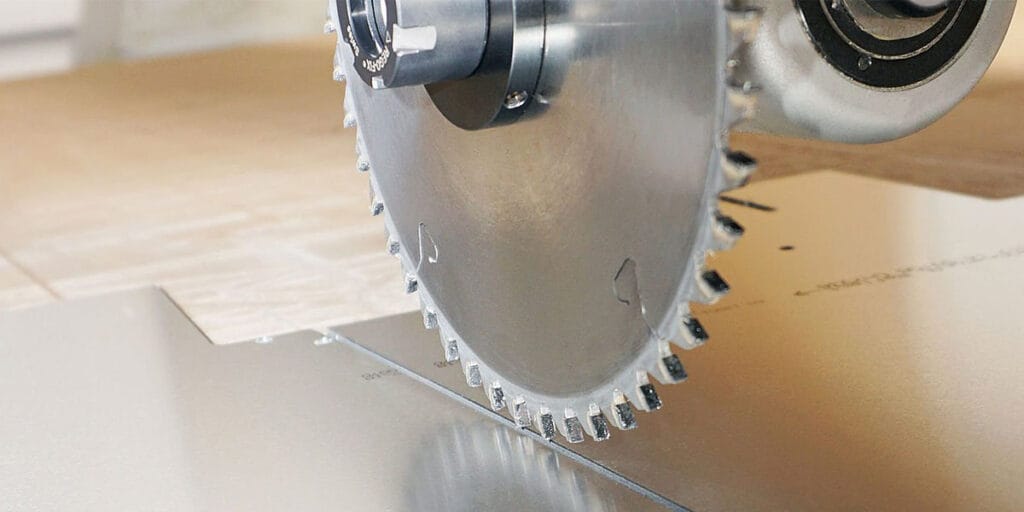
Use a circular saw or jigsaw equipped with metal-cutting blades to cut the panels. Avoid cutting by hand, as it can compromise precision and safety.
Opt for a cutter that finishes in one pass for a clean edge. This reduces material waste and ensures a smooth finish.
Choose dust-free cutting methods to protect your health and maintain a clean workspace.
Select a machine that handles large panels and requires minimal effort for user comfort.
Tip: Practicing on scrap panels can help you gain confidence before cutting essential pieces.
Drilling and Preparing Holes
Drilling holes correctly is crucial for securing the panels without causing damage. Here’s how you can do it:
Mark the drilling points on both the panels and the surface using a pencil or marker. Ensure the markings align with your installation plan.
Use high-quality drill bits to create clean holes. This reduces the risk of cracking or damaging the panels.
Maintain a dust-free environment to prevent scratches or defects during the process.
Avoid applying excessive pressure while drilling. Let the tool do the work to achieve precise results.
Common Mistakes to Avoid:
Using the wrong tools for drilling.
Failing to secure the panels properly during the process.
Skipping practice on unused panels, especially if you’re a beginner.
Attaching Brackets or Adhesive
The method you choose for attaching the panels depends on your project requirements. Here’s a comparison of brackets and adhesive to help you decide:
Simplifies installation without mechanical fasteners.
Limited to specific types of surfaces.
| | Provides a smooth, seamless finish. | Adhesive strength may degrade over time. | | | Reduces thermal bridging. | Requires regular checks. | | Mechanical Fastening System | Provides strong and secure attachment. | Visible fasteners may affect aesthetic appeal. |
| | Suitable for high-wind areas and large panels. | Installation time may be longer due to alignment. | | | Easy to inspect and maintain. | |
For brackets:
Secure the brackets to the surface using screws. Ensure they are tightly fastened for a stable hold.
Align the brackets with the pre-drilled holes on the panels.
For adhesive:
Apply the adhesive evenly across the back of the panel. Use a notched trowel for consistent application.
Press the panel firmly onto the surface, ensuring it adheres properly.
Note: Always follow the manufacturer’s guidelines for adhesive application to achieve the best results.
Mounting the Panels
Mounting the panels is a critical step in the acp sheet installation process. Proper alignment and secure attachment ensure a professional and durable finish. Follow these steps to mount the panels effectively:
Align the panels with the marked positions: Place each panel carefully against the surface. Use the markings you made earlier as a guide. Double-check the alignment with a level to ensure the panels are straight and even. Misaligned panels can affect the overall appearance and stability of the installation.
Secure the panels to the brackets or adhesive:
If you are using brackets, align the pre-drilled holes on the panels with the brackets. Insert screws through the holes and tighten them securely using a screwdriver or power driver. Avoid overtightening, as this can damage the panels.
For adhesive fixing, press the panels firmly onto the adhesive-coated surface. Apply consistent pressure across the panel to ensure proper adhesion. Use a rubber mallet or roller to eliminate air pockets and achieve a smooth finish.
Tip: Work systematically, starting from one corner and moving outward. This approach helps maintain alignment and prevents gaps between panels.
Sealing and Finishing
Sealing and finishing add the final touches to your installation. These steps protect the panels from environmental damage and enhance their appearance.
Apply sealant to edges and joints: Use a high-quality weatherproof sealant to seal all edges and joints. This step prevents moisture and air infiltration, which can compromise the durability of the installation. Apply the sealant evenly using a caulking gun. Smooth the sealant with a tool or your finger for a clean finish.
Remove the protective film: Once the panels are securely mounted and sealed, peel off the protective film. Do this immediately after installation to avoid leaving adhesive residue on the panels. Removing the film also reveals the panels’ final appearance, allowing you to inspect the installation for any adjustments.
Note: Inspect the entire surface after sealing and finishing. Address any gaps or imperfections promptly to ensure a flawless result.
By following these steps, you complete the installation process with precision and care. Proper mounting and finishing not only enhance the panels’ aesthetic appeal but also ensure their long-term performance.
Methods of Attaching Aluminum Composite Panels
When attaching aluminum composite panels, you can choose from several methods depending on your project’s requirements. Each method offers unique benefits and is suited for specific applications. Below, you’ll find a breakdown of the most common techniques.
Mechanical Fixing
Mechanical fixing involves using screws, bolts, or brackets to secure the panels. This method ensures a strong and durable attachment, making it ideal for areas exposed to high winds or requiring extra stability.
Steps for Mechanical Fixing:
Align the panels with pre-drilled holes on the surface.
Insert screws or bolts through the holes and tighten them securely.
Double-check the alignment to ensure a professional finish.
Advantages:
Provides a robust attachment, especially in challenging environments.
Easy to inspect and maintain over time.
Disadvantages:
Visible fasteners may affect the aesthetic appeal.
Installation time may increase due to the need for precise alignment.
Adhesive fixing uses specialized adhesives to bond the panels directly to the surface. This method creates a seamless look, making it perfect for smooth and even surfaces.
Steps for Adhesive Fixing:
Apply adhesive evenly across the back of the panel using a notched trowel.
Press the panel firmly onto the surface, ensuring proper adhesion.
Use a roller to eliminate air pockets and achieve a smooth finish.
Advantages:
Simplifies the installation process and reduces labor time.
Provides a clean, seamless appearance without visible fasteners.
Disadvantages:
Adhesive strength may degrade over time, requiring periodic checks.
Limited to surfaces that are smooth and free of irregularities.
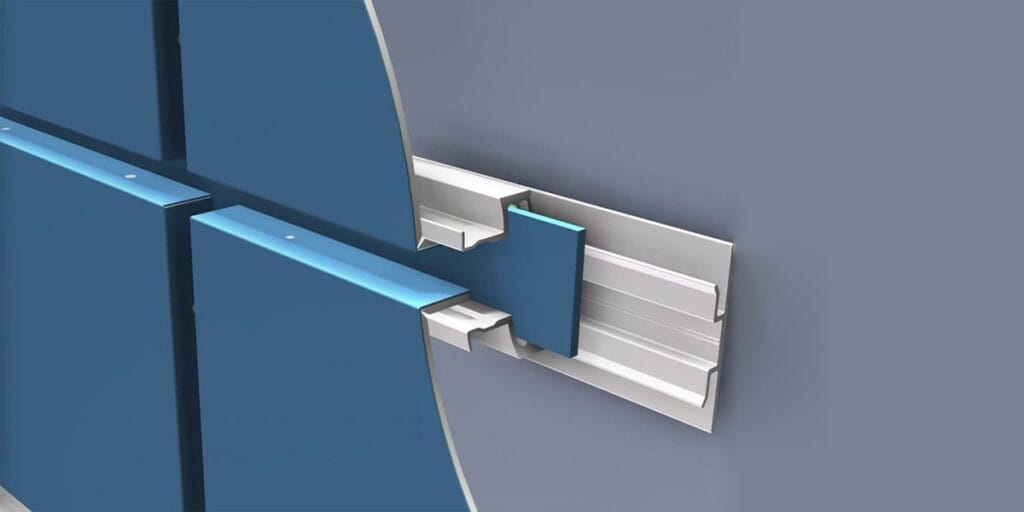
Using Mounting Systems or J-Trim
Mounting systems, such as J-trim, offer an efficient way to attach panels while maintaining a polished appearance. These systems hide fasteners and caulk, ensuring a clean and professional finish.
Steps for Using J-Trim:
Attach the J-trim to the edges of the installation area.
Slide the panels into the trim, ensuring they are securely aligned.
Inspect the joints to confirm a seamless integration.
Designed for efficiency and precision, reducing labor time and maintenance costs.
Seamless Siding Integration
Hides fasteners and caulk, providing a clean and crisp appearance.
One-Piece Design
Saves time and ensures a cleaner finish compared to traditional multi-piece installations.
Compatibility
Works with various siding materials, ensuring flexibility in installation.
Reduced Maintenance
Eliminates the need for additional caulking, which can deteriorate over time.
By choosing the right method for your project, you can ensure a durable and visually appealing installation process. Whether you prioritize strength, aesthetics, or efficiency, these methods provide reliable options for attaching aluminum composite panels.